I’ve been living with a pinched purse (or rather, I now really need to because of huge spendings) and so I’ve gotten creative with my beauty routine.
Feeling good about yourself makes you shine, and that shouldn’t be affected by your budget. Sometimes the key to confidence might be something as simple as your skin looking and feeling good as you stroll into school or the office, so don’t feel glum about not being able to buy the newest products from Sephora.
Here are some tips for when you’re strapped for cash:
 Manual Face Brush
  Clarisonic Cleansing Device
Using a manual face brush saves you money and gives you a clear complexion
My skin has this tendency to act up (especially around hormonal times) and as I posted earlier blackheads are one of my biggest problems, followed by some lovely ornamental pimples along my jawline. So, as I perused through skin care aisles at local drug stores or department stores, I longed to try a Clairisonic brush— a widely well-reviewed automatic brush that works your cleanser into your skin and helps exfoliate at the same time. The problem? Its price tag…. ranging from $160-$400 it simply wasn’t an option.
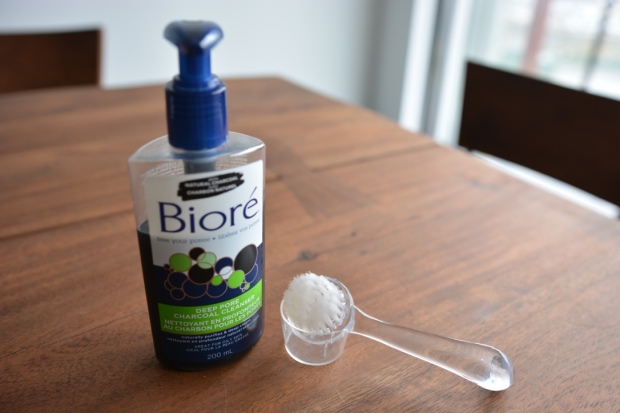
Then one day I stumbled upon a manual face brush that does the same as a Clairisonic —as long as you put in some elbow grease— for a whopping $4.00!! I swear, using it to work with my facial cleanser (I use Bioré Charcoal Cleanser, though probably any cleanser would work) my skin has improved very significantly— very few blackheads and skin across my forehead and cheeks seems silky smooth; I don’t even have to use my exfoliating gel as often! I use it morning and night and have a much healthier complexion because of it.
HIGHLY Reccommened!
 Home Made Lip Scrub
  Lush’s Store Bought Scrubs
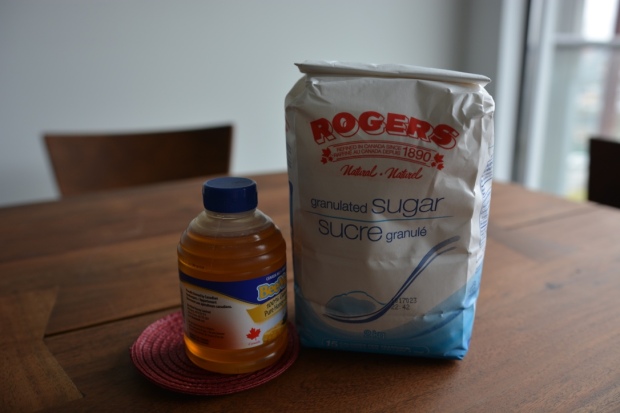
The only ingredients you need for lip scrub: honey and granulated sugar
I love Lush, don’t get me wrong, but last time I was in the shop I saw that their lip scrubs were going for $10!! Personally I think that’s very overpriced (and also I am not a fan of their “popcorn” flavoured lip scrub… who wants to put butter all over your face?)
The best lip scrub I’ve ever used was one I made, and it takes TWO ingredients: granulated sugar and honey.
You honestly just put a one to one ratio (or maybe 3/4 tsp sugar to one tsp honey) mix it together and put it in a small, sealable container.
When your lips are dry, take a small dab on your finger and rub it across your lips; it will gently exfoliate dead skin away AND moisturize with the honey. When you’re all done, you just rinse it of with some warm water (or eat it, it’s delicious and much better than butter-flavour if you ask me!)
 Baby Shampoo
  Bumble and Bumble Shampoo
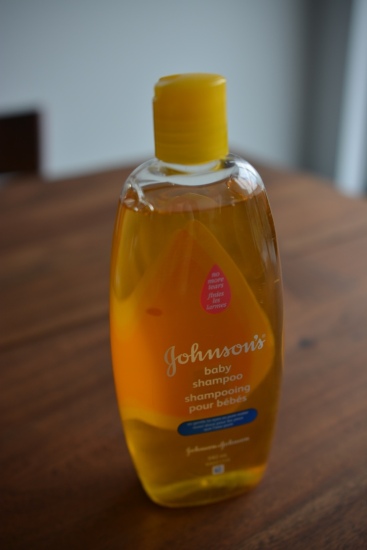
Sometimes simplicity is best. No tears for your eyes or your wallet
Okay, this might sound like I’m stretching it, but it’s true: Baby Shampoo works better than salon shampoo.
I have tried to make my hair my crowning glory since I was a little girl and it has never wanted to behave or grow beyond my collar bones. I have done every step possible, including buying high-end salon shampoos like Bumble and Bumble, to no avail.
But recently I had to have a surgery that left me unable to shower for two weeks, followed by a strict regiment of only washing with baby shampoo (with no conditioner!)
Surprise, surprise, my hair felt (and looked!) amazing! With it’s very simple formula it isn’t choked with chemical ingredients, and it’s very inexpensive so you can use as much as you want. Just lather it through your hair and scrub your scalp with you fingers and rinse it out (and you don’t have to worry about it getting in your eyes!).
I did end up adding conditioner to my regime once again, I think moreso because I thought that’s what people are supposed to do, but I don’t think I really needed it; since the addition of conditioner my hair honestly doesn’t look look sleeker or shinier. Sometimes I think it looks drier. So, I’ll probably end up ditching that and continue my old regime of simply putting a small amount of coconut oil on the ends of my hair, and allover my hair the evening before I’m going to wash it.
 Vinegar
  Hand Creme
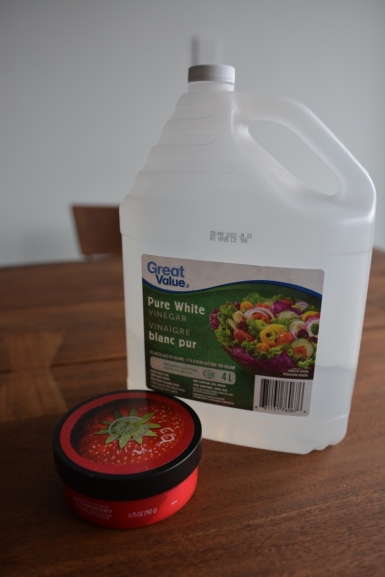
This sounds crazy, I know, but by happy accident I found out vinegar is an amazing hand moisturizer!
I was making kombucha last week, and to sanitize your hands for the project you CANNOT use soap; you have to use vinegar. It just so happens that for the past couple weeks I had noticed my hands becoming drier and more irritated. I’ve had mild eczema on my hands since I was a kid, so this wasn’t new.
But almost immediately after rinsing my hands with vinegar (it does sting a little if you have cuts) I noticed my skin became softer and less red. Absolutely miraculous.
The next day, too, my skin was silky smooth. I looked it up and many people do actually use it in a variety of ways for its moisturizing property! Now, I wouldn’t recommend that you dunk your hands in vinegar every day. It is pretty acidic and the smell is strong, but I would suggest diluting it with water, and maybe put a few drops of your favourite oil for smell.
 Baby Powder
  Deodorant
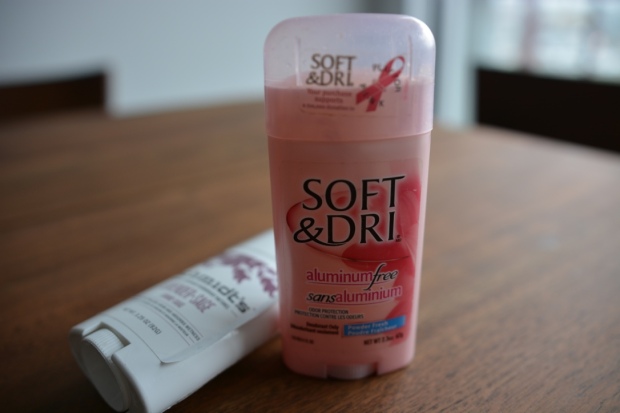
While I try to use natural or aluminum-free deodorants, there is another, cheaper solution
I seem to have a constant battle with deodorant— not because I smell or over-sweat, but just because I can’t find one I like. I want to go with natural or aluminum-free ones because some people believe deodorant is linked to breast cancer (no agreement on that, but I’d rather be safe than sorry). But, natural deodorants always have issues: they don’t work well, they have a colour to them, or they’re just awkward to put on. One deodorant even discoloured by skin and caused bumps of irritation.
But then I remembered seeing my grandfather getting ready in the morning once, and he used his age-old tradition of putting some baby powder under his arms. It turns out that talc (the clay in baby powder) and talcum powder are constantly used to absorb moisture, not just in babies but even for things like NBA player using it on their hands to keep them dry.
It is an antiperspirant— that is, it absorbs the moisture— and not a deodorant, you will still smell.
*** also, a side note. In researching this a bit more, be aware that baby powder should not be used by women in their “nether regions.” While it would be assuring to know that things aren’t getting too sweaty down there, people have won lawsuits against Johnson and Johnson after linking long-term use of baby powder with ovarian cancer. The major risk is that the talcum powder would enter the cervix and affect the reproductive system, so I don’t see how this could happen if you put it on your underarms, but just and FYI.
 Cetaphil
  Shiseido
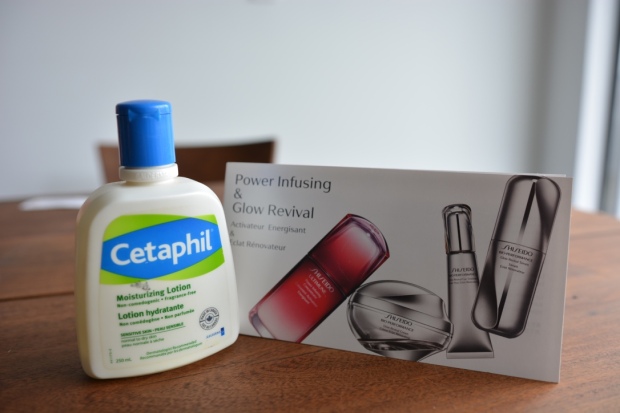
Sometimes plain and simple is best
I have probably tried every skin product available… okay maybe that’s a bit of an exaggeration, but I’ve definitely come close. I’ve used everything ranging from drug store brands to prescription creams to high end acne brands. I’ve even been on Accutane twice.
While I’ve had minor successes with Shiseido (I used the Ibuki line and I really liked it) it is a bit inconsistent… Sometimes my skin loves it, sometimes it hates it.
The best topical product I’ve used that I can consistently rely on is Cetaphil It’s a very simple moisturizer and I find the best results happen when I apply a copious amount on my face while my skin is still slightly damp from washing it. Just slather it on there to the point that you feel like you have too much on. Seriously, you want to get to the point that you have too much cream on to rub in— you can always use excess amounts on your hands and neck.
Your skin will glow, and even sensitive skin won’t plug up.

So yeah! Those are my cost-worthy tips. Let me know what you think, or if you have any more!
Best,
XOXO


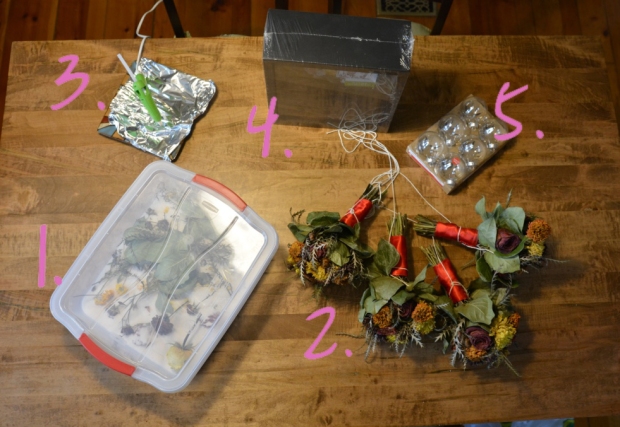
 An air-tight container and some
  Dried bridal party bouquets— I hung these upside-down as a cautionary measure because I had never used silica gel before, so I wanted a solid backup plan. Honestly, I didn’t end up needing them, but if you want extra foliage for volume, it might be a good idea.
 A hot glue gun and glue sticks
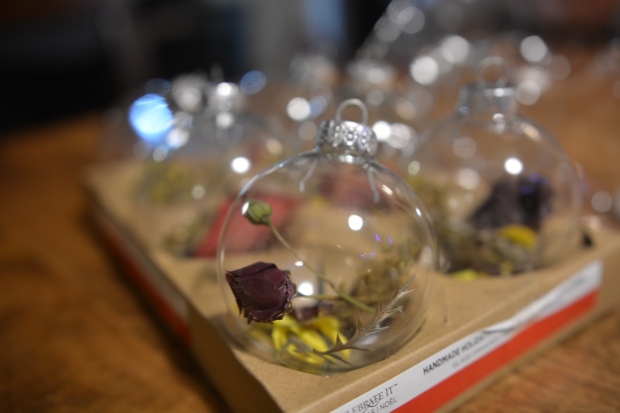
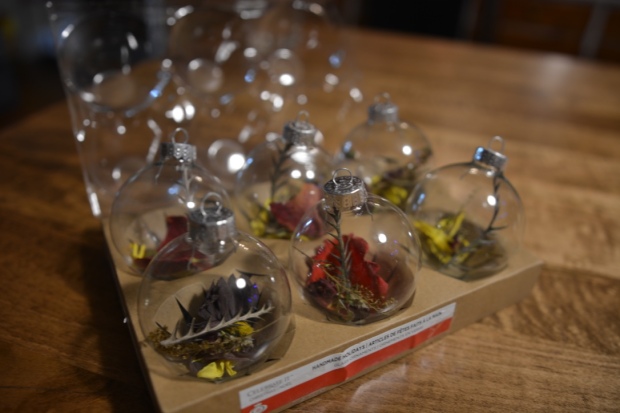
 Glass, fillable christmas ornaments— this was just something I wanted to try and it actually worked out really well.
 Buy enough silica gel! I only bought one box because each one was $25 and I thought it was over-priced. While my one box worked okay, I know that the results would have been better if I had two boxes. The ideas is that you take apart your wedding bouquet place each flower individually in silica gel. Plus, you can reuse the silica for a very long time, so it’s not a waste to have more.
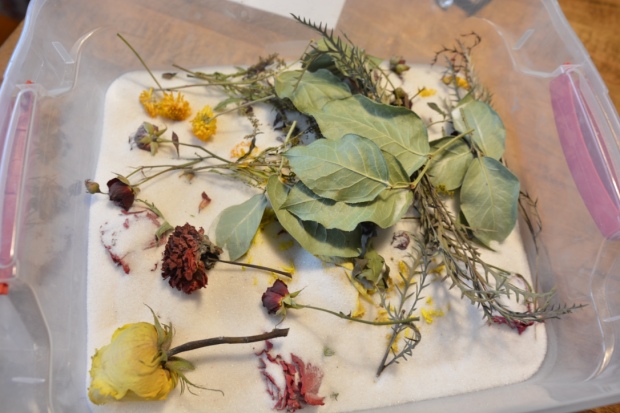
 Cover your mouth and nose when you pour the silica gel. It doesn’t actually tell you to do that on the box, and it’s probably not that big of a deal, but the silica’s job is to absorb moisture and I noticed that if I breathed it in I would start coughing and feel very dry. So, maybe I’m paranoid but I didn’t want that in my system.
 I also dried my bridal party’s bouquets as a backup, just incase my less-than-satisfactory amount of silica didn’t do the job. If you’re going to do this, for goodness sake unwrap the bouquets, pat them dry, and THEN tie them and hang them upside-down. I didn’t do this and when I unwrapped them when they were dry there was mold growing on a bunch of them.
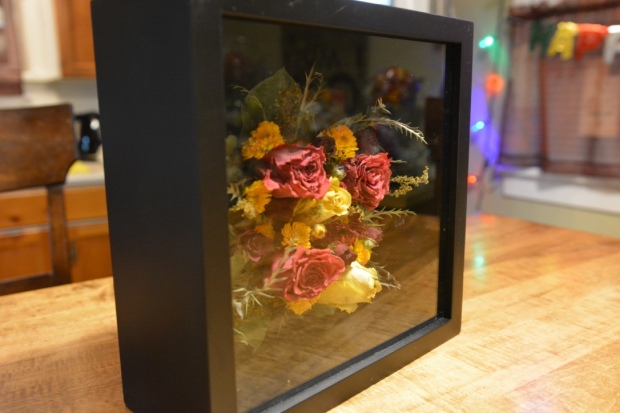
 On the left you can see the flowers that were placed in silica gel— their colour and shape were preserved much better than those that were simply hung upside-down. I think if I had fully buried them, they would have been even better. My wedding was an autumn-themed wedding, so the colours were very bright when they were fresh.
 When you start building together your bouquet, start by making a full, green background base. This gives you something to build off of, and makes sure that no matter what you place next you don’t have any empty space. I chose to make my shadow box as though I were looking down at my bouquet from above, so I built up the shape as it would be if I was holding it below.
 I put one prominent flower (in this case, a yellow rose) in the middle of the bouquet and built out from there. I found this made it easier to be symmetrical, but if you don’t want to do that, let your creativity shine!